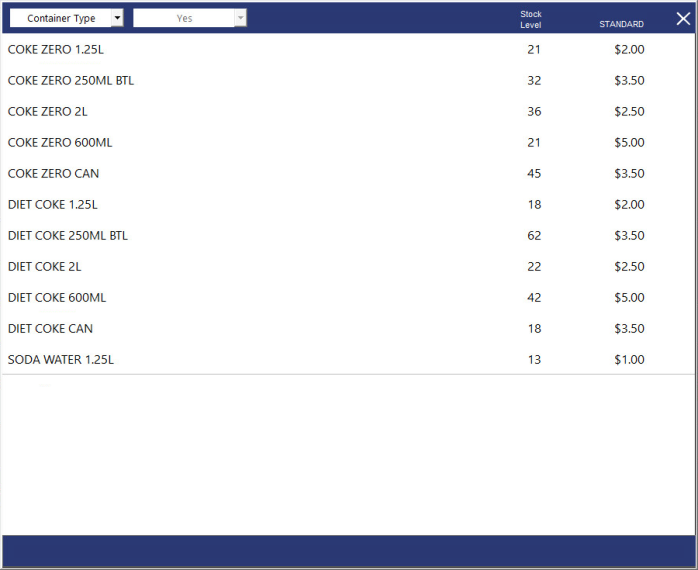
Dynamic POS Menus by Attributes can be used to display dynamic POS Screen Menus by utilising Stock Item Attribute Types.
When a POS Screen button has been linked to one or more Attribute Types (a maximum of three Attribute Types can be linked to the POS button) and the clerk presses the POS Screen button, a dynamic POS Screen Menu will be displayed. The menu will contain a list of all the Stock Items that are linked to the Stock Item Attributes which were configured on the POS Screen button.
A dropdown box for each Attribute Type linked to the button will be displayed at the top of the POS Screen menu.
The dropdown boxes can be used to filter the list down to the individual Attribute.
Steps required to configure Dynamic POS Menus by Attributes:
Before Stock Items can be assigned to Attribute Types/Attributes, you need to ensure that the required Attribute Types and Attributes exist in your system.
Go to: Back Office > File > Sales > Stock Item Attributes
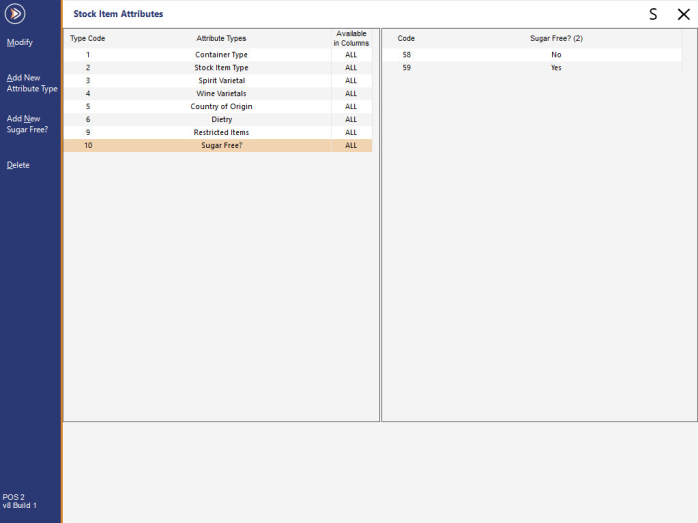
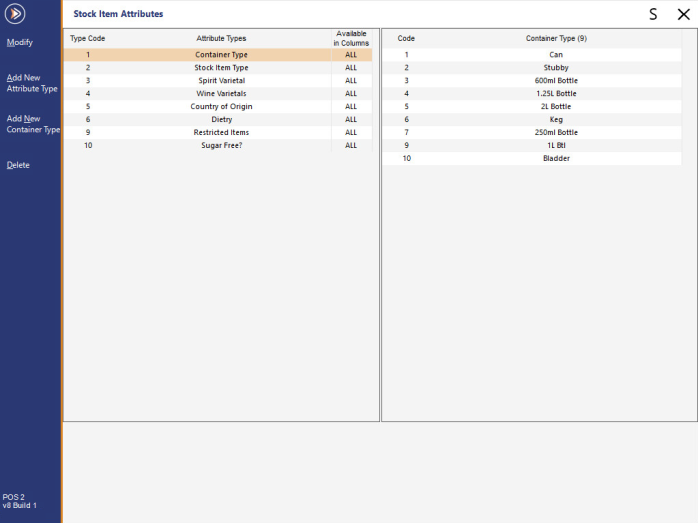
The Attribute Types are shown on the left-hand side column, and the Attributes for the currently selected Attribute Type will be shown on the right-hand side column.
To demonstrate the usage of this function, we will create two Attribute Types (you can create additional or different Attribute Types depending on the types of items you want to group and how you want to categorise or group them):
Press the "Add New Attribute Type" button on the top-left hand side of the window, then enter a description for the Attribute Type (e.g. Container Type or Sugar Free).
Press "Save" on the top-left corner.
After creating a new Attribute Type, it will be highlighted automatically - Press the "Add New Container Type" or "Add New Sugar Free?" button on the top-left corner to add new Attributes to the Attribute Type.
E.g. For Container Types, create attributes such as 600ml Bottle, 1L Btl, etc.
For Sugar Free?, create attributes Yes and No.
If you require further in-depth instructions on how to create Attributes, please click here to go to the Attributes topic.
Take note of the Type Code shown next to the Attribute Type and the Code shown next to the Attribute (these will be used later when creating a POS Screen button).
The below example shows the Container Type Attribute Type on the left, with each Container Type on the right.
FIGURE 1: The Attribute Type (Container Type) is selected within the left column, Container Types are shown within the right column.
The below example shows the Sugar Free Attribute Type on the left, with the No and Yes Attributes on the right.
FIGURE 2: The Sugar Free Attribute Type is selected within the left-hand column, and the Yes/No Attributes are shown within the right-hand column.
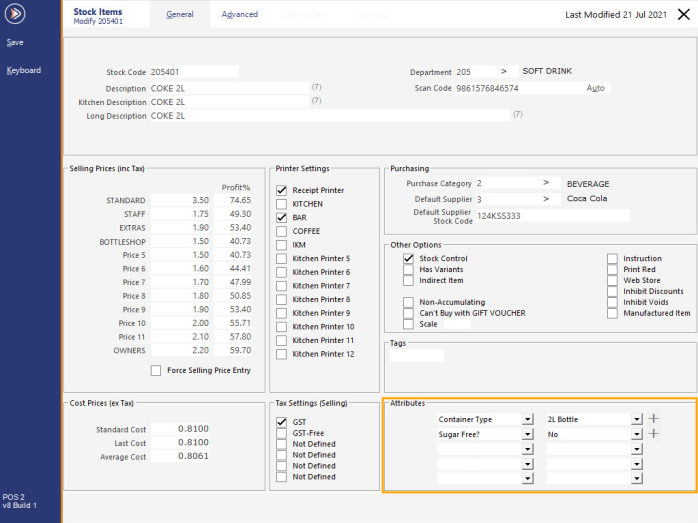
Once Attribute Types and Attributes have been created, Stock Items will need to be assigned to the corresponding Attribute Types and Attributes (e.g. COKE 2L will need to be linked to Container = 2L Bottle, Sugar Free? = No).
Go to: File > Stock Control > Stock Items
Search for the required items (e.g. by Department), select the required item from the Stock Items grid > Modify.
From the Attributes section on the bottom-right corner of the window, select the Attribute Type from one of the first dropdown boxes on the left (e.g. Container Type), then select the Attribute from the corresponding dropdown box on the right (e.g. 2L Bottle).
Take note that when configuring Attribute Types, you may want to ensure that you always assign the same Attribute Type to the same Attribute Slot across all your items (e.g. Attribute 1 for Container Type, Attribute 2 for Sugar Free?, etc.). This is not explicitly required for this function; however, it will be beneficial utilising the same Attribute Slots for the purpose of filtering the Stock Items grid by Attributes.
FIGURE 3: Assign the required Attribute Type and Attribute within the Attributes section on the bottom-right corner of the Modify Stock Item window.
Repeat the above process to link other items to the required Attribute Types/Attributes.
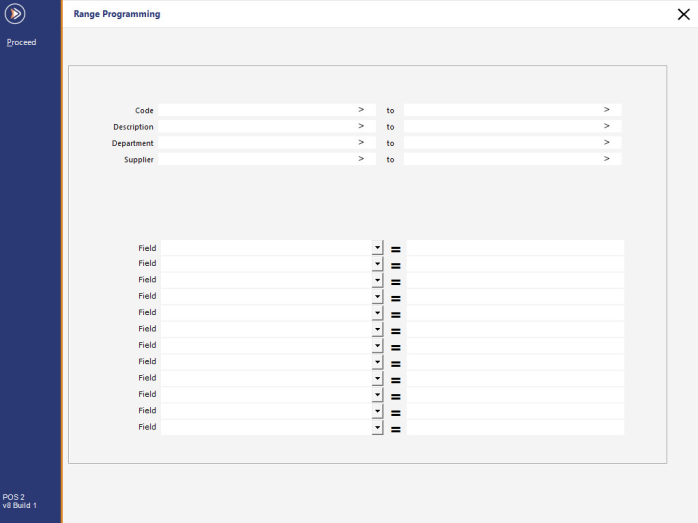
Alternatively, you can utilise the Range Programming function to assign items by range to the required Attributes and Types. However, your items will need to be within a specific range (whether a Code, Description, Department and/or Supplier Range).
Range Programming is an advanced feature and should be used with caution; incorrect use of Range Programming can result in the wrong items being modified.
Range Programming is accessible via Back Office > Utilities > Range Programming > Stock Items.
FIGURE 4: The Range Programming window can be used to apply changes to multiple items at once.
Once your Stock Items have been linked to the required Attribute Types/Attributes, you will need to create one or more POS Screen buttons.
Go to: Back Office > Setup > POS Screen > POS Screen Setup.
Select a POS Screen Layout > Buttons.
On the POS Screen Layout, select a POS Screen tab where you'd like to create the button, then find an unused button and click on it.
A button can be configured in the following ways:
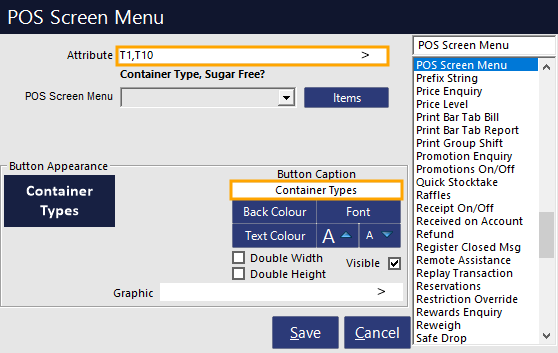
FIGURE 5: An example showing the configuration of a POS Screen button to display all Stock Items linked to one or more Attribute Types, regardless of Attribute Code.
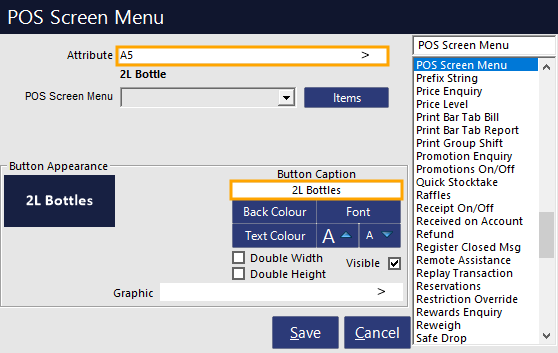
FIGURE 6: An example showing the configuration of a POS Screen button to display all Stock Items linked to a specific Attribute.
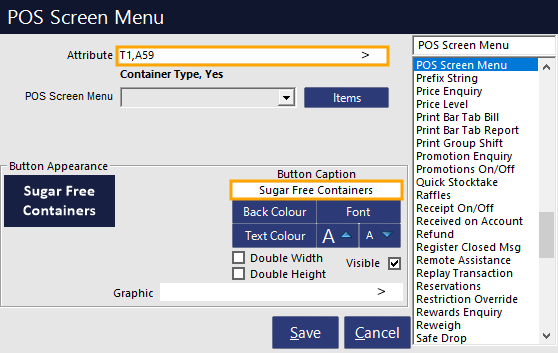
FIGURE 7: An example showing the configuration of a POS Screen button to display Stock Items linked to Attribute Types and Attribute Codes.
Once the POS Screen buttons have been configured as required, this function is now ready for use.
Open the POS Screen by pressing the "POS" button on the top-left corner of the Dashboard.
Navigate to the POS Screen tab which the button(s) were created, then press them.
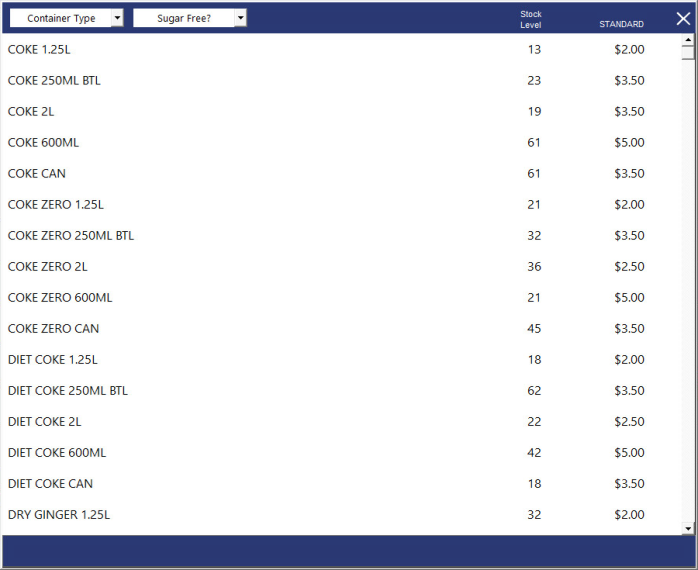
Depending on whether the button was linked to an Attribute Type, Attribute Code, or both, the window that appears in the POS Screen will be similar to the below example and will contain a list of items that are associated with the Attribute Types/Attributes linked to the POS Screen button:
FIGURE 8: The Dynamic POS Menus by Attributes window displaying two dropdown boxes on the top-left corner that can be used to filter the list of Stock Items displayed.
The top-left corner of the window contains a dropdown box for each Attribute Type.
The number of dropdown boxes shown will vary depending on the number of Attribute Types and/or Attribute Codes that were configured, with a maximum number of three dropdown boxes.
The dropdown boxes can be pressed to display a list of all the available Attributes for the Attribute Type.
Selecting an Attribute from the dropdown list will filter the POS Screen Menu so that only items that are associated with the selected Attribute Type will be displayed.
The list can be filtered further by selecting another Attribute option from the remaining dropdown boxes.
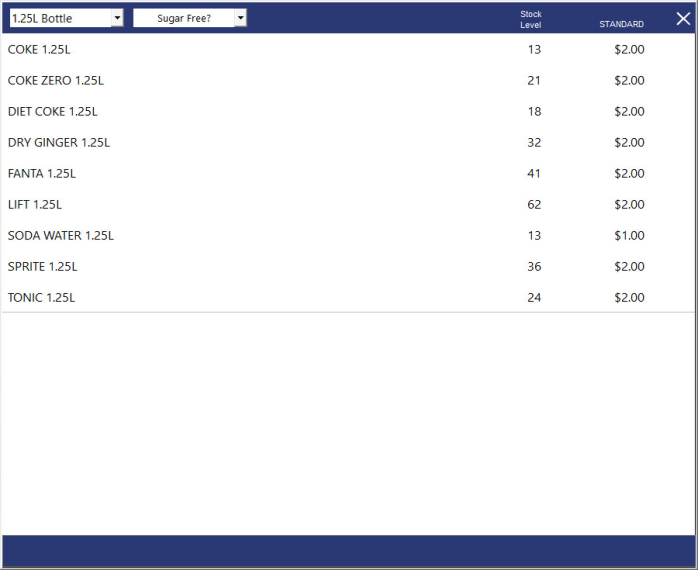
FIGURE 9: The Dynamic POS Menus by Attributes window is shown with the 1.25L Bottle option selected.
The list of Stock Items shown in the window is filtered to only show items that are a 1.25L Bottle.
Sugar and Sugar Free varieties are shown, since the Sugar Free dropdown box has not been changed.
Selecting an item from the list will highlight it:
FIGURE 10: An example of a highlighted item line captured from the Dynamic POS Menus by Attributes window.
Once an item has been selected, additional options (Locations and Sell Item) will be displayed at the bottom of the window.
To see the Locations which the item is available, press the "Locations" button on the bottom-left corner of the window.
To add the item to the sale, press the "Sell Item" button on the bottom-right corner of the window.
FIGURE 11: An example of the Locations and Sell Item buttons that appear at the bottom of the Dynamic POS Menus by Attributes window when a Stock Item has been selected.
If an Attribute Code was entered into the POS Screen button configuration, the dropdown box for that Attribute Code will be locked/read-only.
The below example shows the "Sugar Free?" Attribute Type dropdown box locked to the "Yes" Attribute option.
The Container Type option is available and can be selected to filter by Container Type.
FIGURE 12: The Dynamic POS Menus by Attributes window is shown with only the Sugar Free variety items.
Take note that in this example, the Sugar Free dropdown box is forced as "Yes" and is greyed out.
This is because the Attribute Code was entered into the POS Screen button configuration for the button that was used to trigger this instance of the Dynamic POS Menus by Attribute window.
FIGURE 13: An example of Dynamic POS Menu by Attributes.